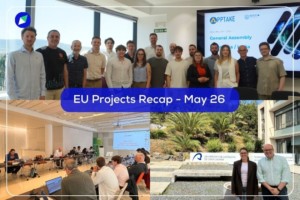
Sploro

sploro

How To Get Your PIC number: A Beginner's Guide


If you want to participate in a call for proposals or tenders with eSubmission, your organisation needs to be registered and have a Participant Identification Code (PIC)

If you are looking to participate in calls and tenders issued by the European Commission (EC), you will need to obtain a Participant Identification Code (PIC) number. The PIC is a unique identifier for your organisation that is used to track and manage participants in EU-funded programs, projects, and initiatives. In this post, we will guide you through the process of obtaining a PIC number for participating in calls and tenders in seven simple steps.

Play Video about PIC NUMBER EC

Step 1: Create your user account

To apply for a PIC number, you will need to first register for an user account (if you already have an account, you can skip this step and simply, log in and start entering information to register your organisation on the Participant Register page.). This account will allow you to access the Funding & Tenders Portal, where you can apply for your organisation’s PIC number and manage your participation in calls and tenders from the European Commission.

To register for your user account, visit the the Registration Website and follow the registration process. You will need to provide some personal information, including your name, email address, and password.

Step 2: Check if your organisation is not already registered

To make sure that your organisation has not already been registered in the Participant Register, search for organisations by clicking on HEREThen, enter the legal name or a part of the name. You may restrict results by selecting a specific country or  expanding the advanced search and applying further filters to the search criteria. Click on Search organisation to display the matches.

Find a registered Organisation PIC EC

If you do not find the organisation, then go to the Participant register and click on the Register your organisation.

Step 3: Prepare all the information needed

To register your organisation, you will need to provide basic administrative and legal data as well as some contact details.

– Legal Name: legal name of the organisation that must correspond to the official legal name in the statute of the organisation.
– Establishment/Registration Country: Select the ‘Establishment/Registration Country’ of the organisation from the drop-down list. Usually this is the location of the headquarters of the organisation.
– VAT Number: Provide the ‘VAT number’ of the organisation (if available). The VAT number is a unique number given to every
organisation that pays Value Added Tax (VAT).Check “not applicable” if you don’t have a VAT number.
– Registration Number: Enter your ‘Business registration number’ of the organisation (if available). This is a unique code identifying your organisation, ordinarily provided by the Chamber of Commerce.
-Website: Specify the Website for official communication with the organisation.

As a general principle, an organisation should have legal personality in order to be registered. If your organisation does not have legal personality, its representatives must prove that they have the capacity to undertake legal obligations on its behalf and that the organisation has financial and operational capacity equivalent to that of legal persons.

As the declared information may need to be verified against supporting documents later on, it is useful to have the relevant information at hand as you complete the registration to make sure you fill in correctly the relevant fields (non-profit, public/private, etc.).

Step 4: Start your application in the Participant Register

In this step, you must provide the basic legal information of your organisation. 

Welcome Participants Register EC

When you enter your organization’s legal name and registration country, you might see a list of other organizations with similar information. This means there could be duplicates in the system. If you find an organization that matches yours, do not continue with the registration process. Instead, use the “Use this PIC” button to get in touch with the current LEAR (Legal Entity Appointed Representative) of that organization. If you don’t find a matching organization, click on “Continue registration” to proceed to the next step.

PIC number Duplicate

Step 5: Provide your organisation data and legal information

To continue with the registration, basic information is required. This includes the organization’s legal and business names, address, postal code, city, registration country, phone number, website, and official language. The legal name is the official name of the organization, while the business name is the name used in everyday operations. The address fields include the street address, city, postal code, and country. The organization’s registration,country website and phone number are also required. Finally, the official language field specifies the primary language used by the organization.

Organisation Data PIC Number

In addition to the basic information previously mentioned, there are several legal details that must be provided to register an organisation. First, the legal entity status must be selected, which can be either a natural person or a legal person. The legal form of the organization must also be specified, and will depend on the registration country. The VAT number, legal register, registration number, and date of registration are also required fields. Additionally, the type of entity must be indicated as either private or public, and whether the organization is for-profit or non-profit. Finally, there are several items that can be used to further define the organization.

legal information PIC

Step 6: Define the Authorised Users

This is the screen where you can create user accounts for people who will be able to update your organization’s registered data until a LEAR (Legal Entity Appointed Representative) is appointed.

When you register your organization, the EU Login of the person registering will automatically become the main authorized user. You can also add another authorized user as a backup. This person will have the same access rights as you and will be able to make updates or upload documents after the registration process. You can find more information about user roles and access rights in the Roles and Access Rights section of the website.

Authorised users PIC

Step 7: Review and Get Your PIC Number!

At this stage, you can check all the information that you have entered in the previous steps. If you find any errors or need to make changes, simply click on the Edit button located at the top right corner of each step. This will allow you to modify any information that needs to be updated.

Review PIC Number

When you have reviewed the data, click on the Submit button at the bottom right corner of the screen and you will be redirected to the Success Scren.

PIC number Success

Once you have obtained your PIC number, you can begin applying for calls for funding or tenders. This will allow you to access a range of funding opportunities offered by the European Commission, which can help support your organization’s projects and initiatives. Simply search for relevant calls or tenders on the Participant Portal website, and submit your application using your PIC number.

Share on twitter
Share on linkedin